Revo 2 Adaptation for Unitree G1 (Testing & FAQ)
Verification & Testing
To perform verification testing, launch two separate terminal instances simultaneously:
Terminal 1: Launch Controller Node and Stark Node
conda activate g1brainco                    # Activate the conda environment
cd ~/unitree-g1-brainco-hand/brainco_ws     # Navigate to the workspace
./launch/launch_robot.sh                    # Execute the launch script
Verify the terminal outputs:
Confirm that the
Port,Baudrate, andslave_idare correct for both hands.Check for
"serial port opened"to ensure successful serial communication.Check for
"Waiting for joint cmd ..."indicating the node is awaiting command inputs. If the above prints do not appear, verify the configurations in your parameters file.Check for
"IK initialization done."indicating inverse kinematics setup was successful.When
"Request 'configure' to start"is displayed, the system is ready to accept transition requests.
Terminal 2: Launch State Machine Transition Node
conda activate g1brainco                    # Activate the conda environment
cd ~/unitree-g1-brainco-hand/brainco_ws     # Navigate to the workspace
./launch/launch_trans.sh                    # Execute the launch script
Triggering State Transitions
Terminal 2 will display the current active state, list available transitions, and show their corresponding actions. Type the designated character(s) + Enter to trigger state transitions. Once the system enters the active state, you can append l or r after command characters to control only the left or right hand respectively. Omitting the suffix defaults to controlling both hands simultaneously.
Hand-Eye Calibration
This procedure supports G1-29 DOF only. Upper-body motions do not lock WaistRoll and WaistPitch; use single-waist mode or add the required locking logic before calibration.
1. Robot Configuration
Modify the general configuration in brainco_ws/src/control_py/config/smach_config.yaml:
mode:
  current_mode: calibr # Select hand-eye calibration mode
Check the calibration configuration in brainco_ws/src/control_py/control_py/state_manager/calibrate/calibrate_config.yaml:
paths:
  cam_calibr_dir: /home/unitree/unitree-g1-brainco-hand/cam_calibr

collection:
move_range: [0.015, 0.015, 0.015, 0.15, 0.15, 0.15]cam_calibr_dir: Directory for saving calibration datamove_range: Random end-effector motion range during calibration data collection
2. Unitree Terminal 1: Start the Main Control Node and Dexterous Hand Node
# Enter the workspace
cd ~/unitree-g1-brainco-hand/brainco_ws
# Activate the environment
conda activate g1brainco
# (Recommended) Start arm-only control
./launch/launch_robot.sh arm
Check the output:
- IK initialization is complete:
"IK initialization done." - When
"Request 'configure' to start"is displayed, you can send state-transition requests.
3. Unitree Terminal 2: Start the Agent Network Service
# Enter the workspace
cd ~/unitree-g1-brainco-hand/brainco_ws
# Activate the conda environment
conda activate g1brainco
# Start the Agent service
./launch/launch_trans.sh agent
4. Client PC: Open the Control GUI
# Enter the client directory
cd ui_client
# Activate the conda environment
conda activate braincogui
# Start the GUI
python ui_client/ui_client.py
5. Collect Hand-Eye Calibration Data
Prepare a chessboard calibration board first.
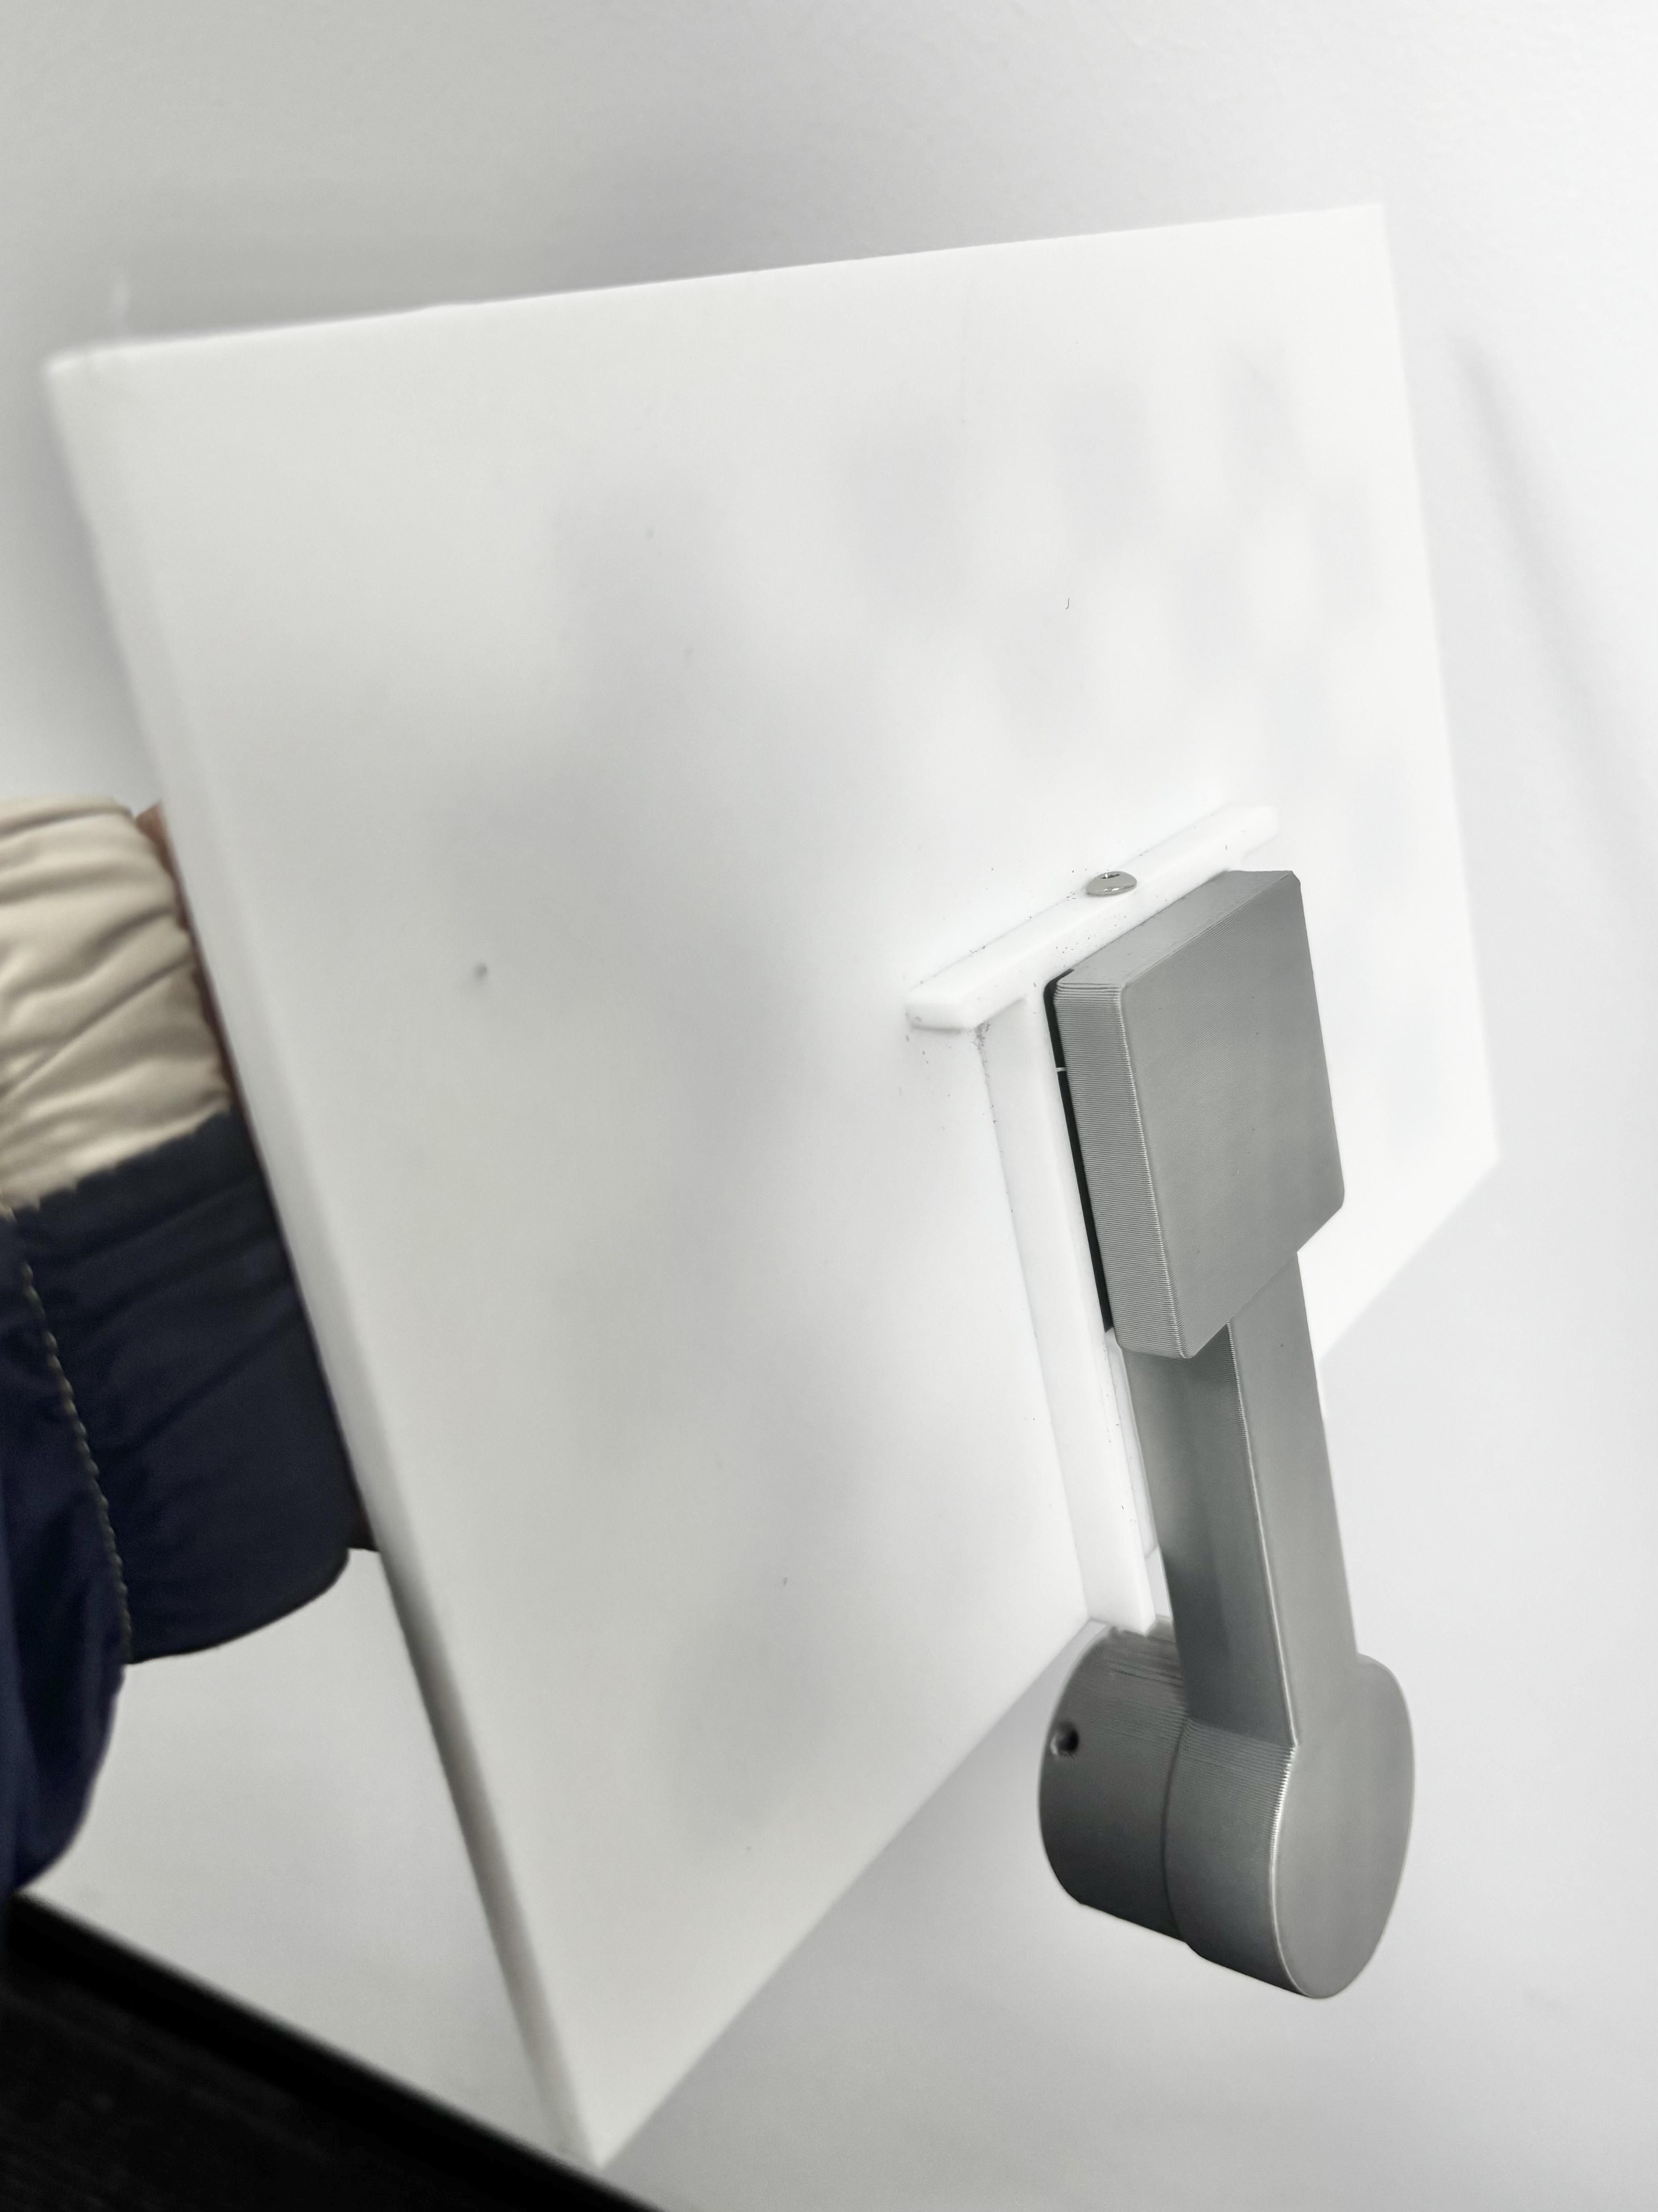
- Calibration board bracket: Download and print the calibration board bracket, which uses the same wrist interface as Revo 2.
- Chessboard calibration board: Produce the board from the calibration board pattern, then mount it on the bracket.
After assembly, you can directly replace the Revo 2 hands with the board/bracket assembly for calibration.
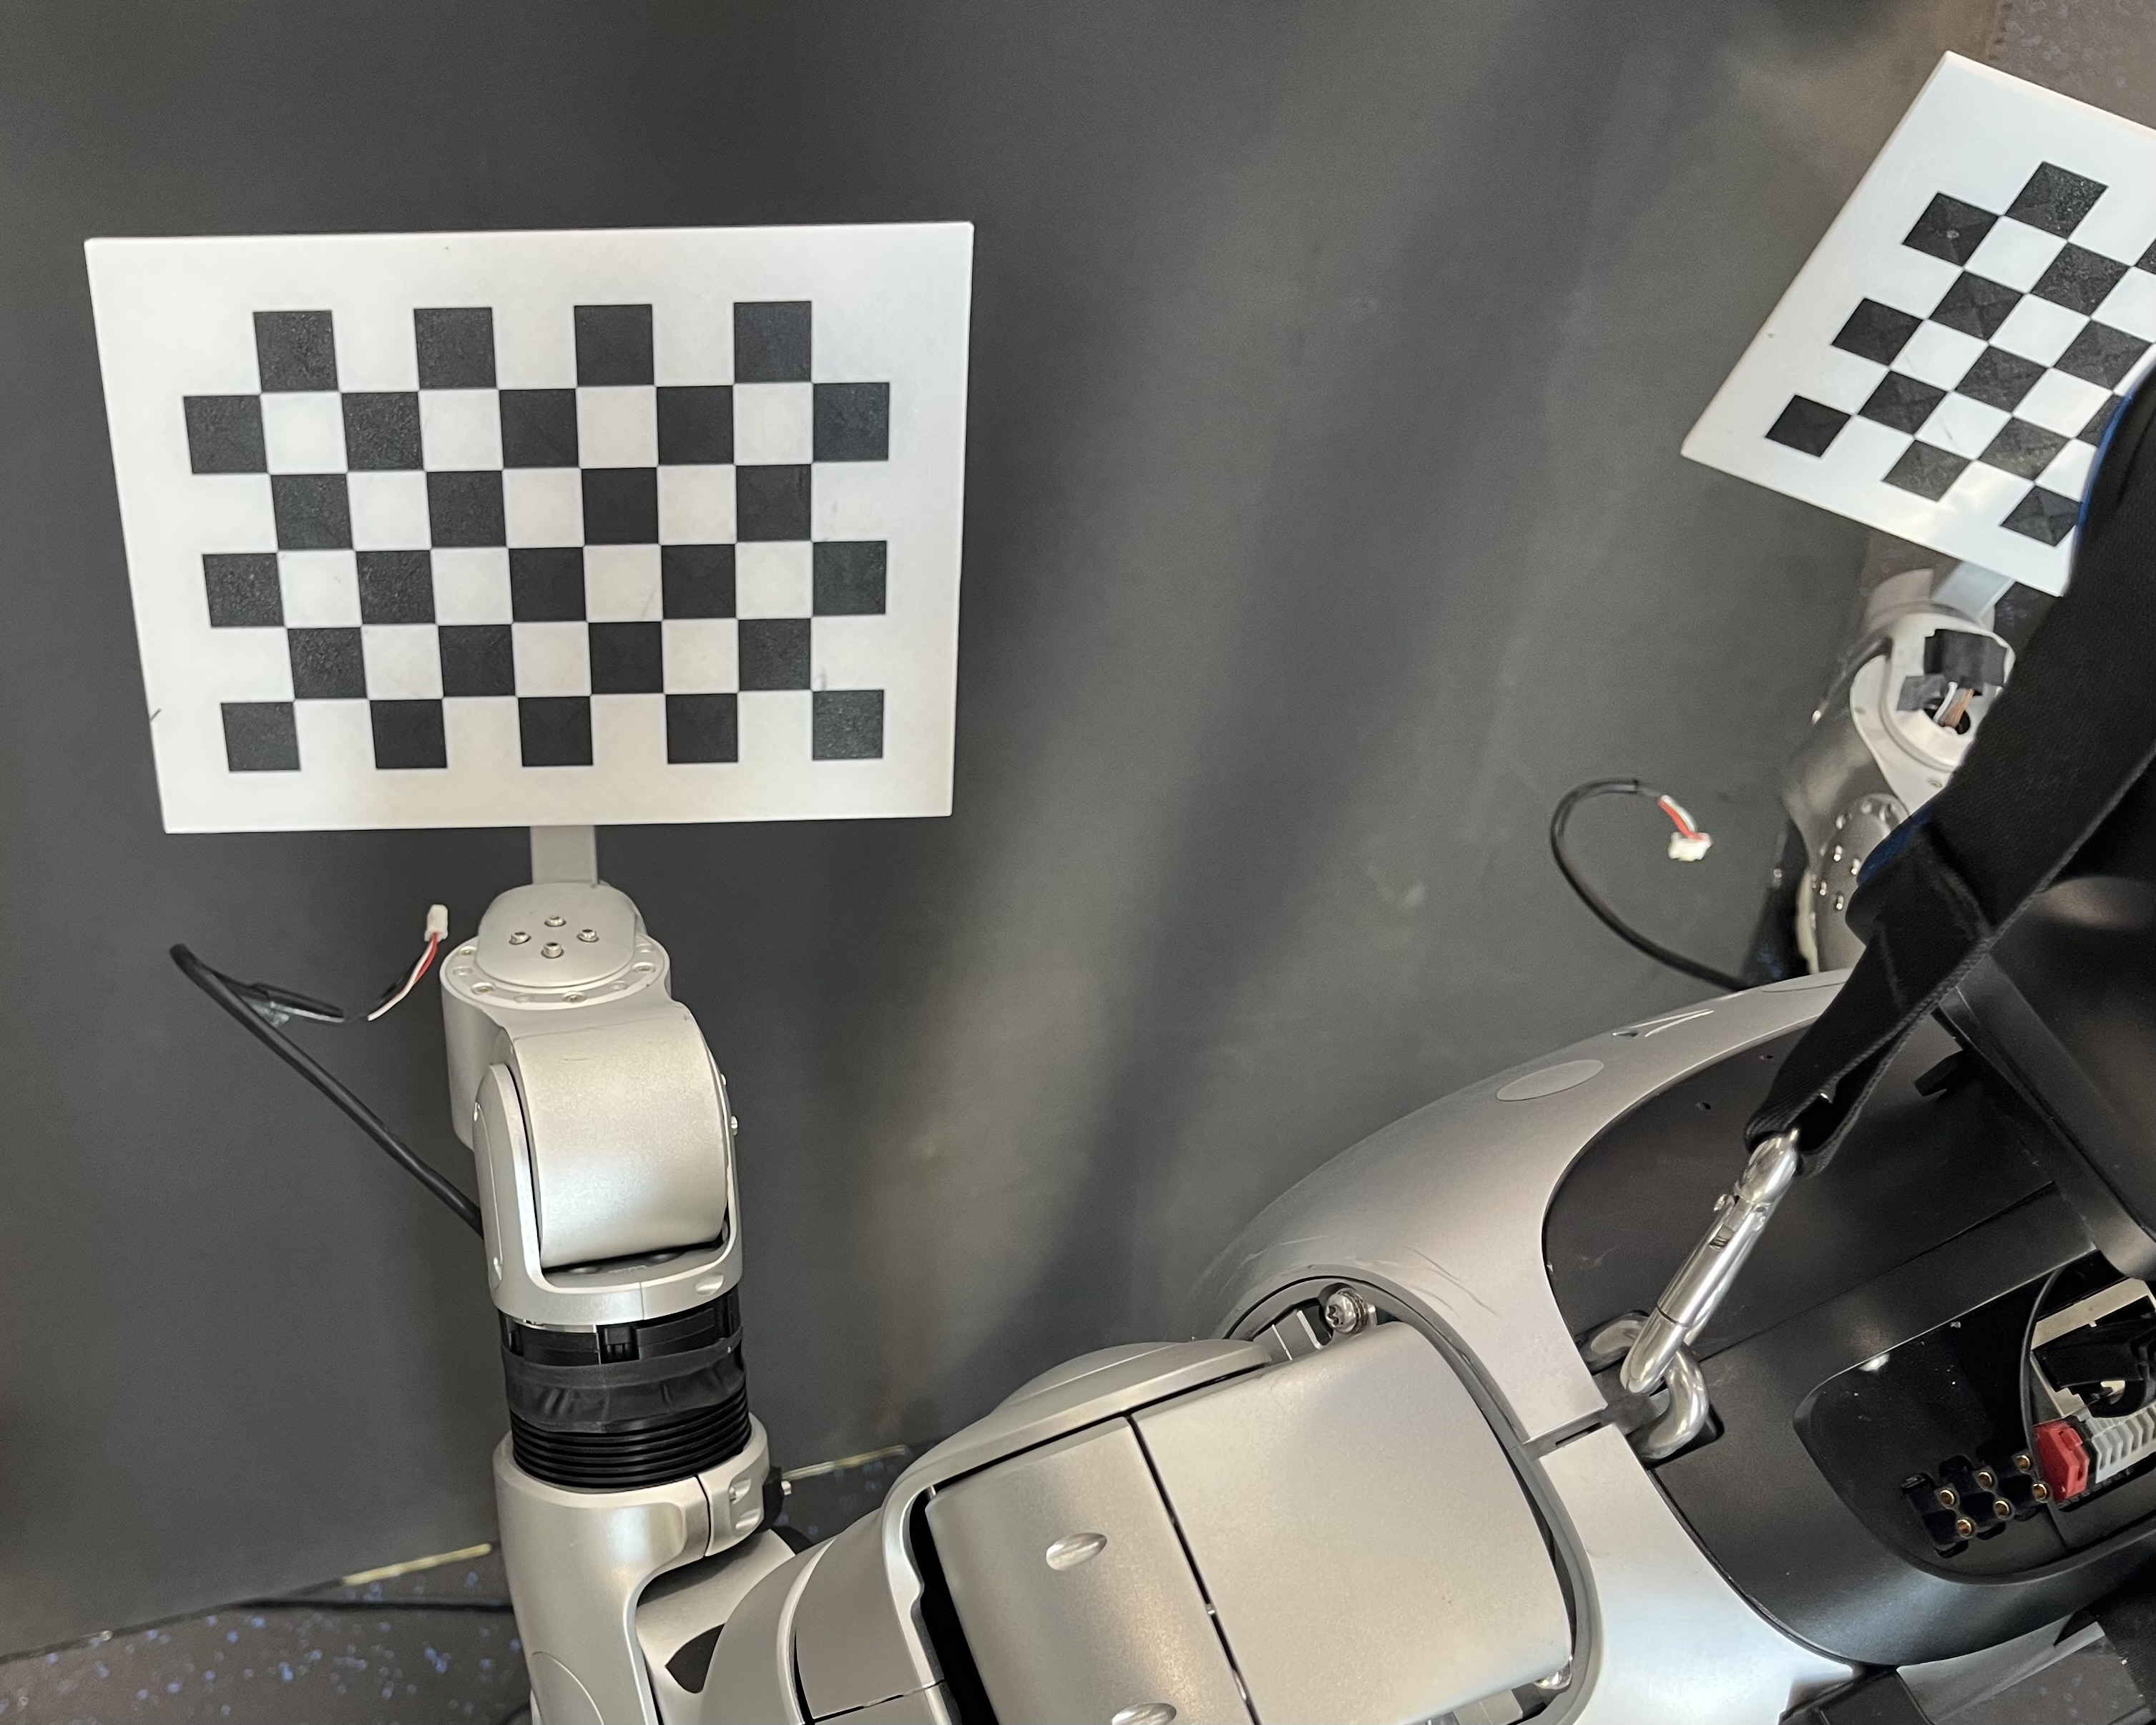
Use the following state sequence to collect data for the left and right arms:
Init -> Ready -> Active -> Calibr-Left-Start -> Calibr-Right-Start -> ReadyDuring collection, the program automatically moves the robot arm randomly and saves the data. By default, 20 samples are collected for each side.
Generated data files:
- Images:
cam_calibr/imgs/left/,cam_calibr/imgs/right/ - Robot arm poses:
cam_calibr/arm_pose/left.json,cam_calibr/arm_pose/right.json
6. Compute Calibration Results Offline
After collecting data for both left and right arms, check the images:
cd ~/unitree-g1-brainco-hand/cam_calibr
chmod +x ./imgs/check_img_grid.sh
./imgs/check_img_grid.sh left
./imgs/check_img_grid.sh right
Compute the calibration parameters offline:
cd ~/unitree-g1-brainco-hand/cam_calibr
python compute_calibration.py
The script writes the calibration result to cam_calibr/settings.yaml.
This file contains the camera extrinsics for the left and right hands. The calibrate mode reads this file later for coordinate conversion.
FAQ
1. Custom Network Configuration Restricts Internet Access
If configuring a custom static IP breaks internet connectivity, delete the default interface gateway routing rule:
sudo ip route del default via 192.168.123.1 dev eth02. Colcon Build Displays System Clock Skew Warnings
make[2]: warning: Clock skew detected. Your build may be incomplete.This warning occurs when the system time defaults to 1970 due to a lack of network connection for automatic NTP synchronization. Solution:
- Remove the default routing rule restricting internet access:
sudo ip route del default via 192.168.123.1 dev eth0- Restart the terminal and verify the system time and synchronization status:
date
timedatectl status- Once the time is successfully synchronized, clean up previous build caches and rebuild the workspace:
rm -rf build install log
colcon build
3. "ros2: command not found" or "Package 'XXX' not found"
This indicates that the ROS 2 overlay or underlay environment configurations have not been sourced in the current shell. Make sure to run:
source /opt/ros/foxy/setup.bash
# or source your active workspace's setup script
source install/setup.bash
4. How to Resolve General ROS 2 Execution Failures
If you encounter persistent ROS 2 node crashes or runtime exceptions:
- Close all active terminal sessions and open clean terminals.
- Clean up previous build outputs (
rm -rf build install log) and rebuild the workspace.
5. Wi-Fi Card Interface Blocked (RF-Kill Issue)
unitree@ubuntu:~$ sudo ifconfig wlan0 up
# Error: SIOCSIFFLAGS: Operation not possible due to RF-killSolution:
- Check the hard/soft block status of wireless devices:
unitree@ubuntu:~$ rfkill list
# 0: phy0: Wireless LAN
#         Soft blocked: yes
# Hard blocked: no- Unblock the Wi-Fi interface using rfkill:
sudo rfkill unblock wifi- Verify that the soft block status has changed to
noand bring the interface up:
rfkill list
sudo ifconfig wlan0 up
6. VS Code Fails to Establish SSH Remote Connection
Ensure that the host device has internet connectivity. A typical failure is the remote extension host installer failing to download required VS Code plugins due to DNS resolution failures:
Failed to connect to the remote extension host server (Error: ExtensionInstallFailed(ExtensionInstallFailed("Error while installing extensions: getaddrinfo EAI_AGAIN marketplace.visualstudio.com...")Solution:
- Connect to the robot via standard shell SSH:
ssh unitree@192.168.xx.xx- Verify external domain connectivity:
ping marketplace.visualstudio.com- Check active DNS servers:
cat /etc/resolv.confIf Ubuntu resolves DNS using the systemd-resolved local stub (127.0.0.53) which fails to forward upstream queries, configure static DNS servers. 4. Open the systemd-resolved configuration file:
sudo vim /etc/systemd/resolved.confUncomment and edit the following properties:
[Resolve]
DNS=8.8.8.8 1.1.1.1
FallbackDNS=114.114.114.114
DNSStubListener=yes- Save changes and restart systemd-resolved:
sudo systemctl restart systemd-resolved- Verify active status and DNS mappings:
systemd-resolve --statusEnsure 8.8.8.8 and 1.1.1.1 are mapped as active servers. You can now establish VS Code SSH sessions successfully.
Contact & Support
For questions or purchase inquiries, contact the BrainCo Dexterous Hand Team or submit a support ticket through the page help entry.