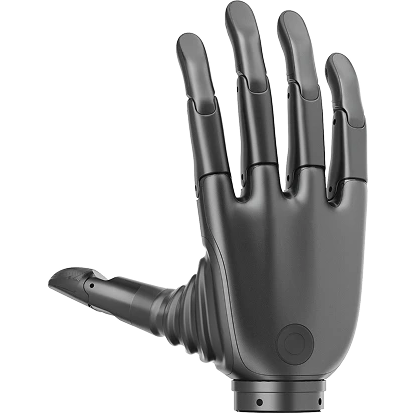
Desktop Control Panel Guide
Revo 3 provides a full-featured production desktop tool and a lightweight debugging GUI bundled with the SDK. The desktop tool supports bus communication setup, real-time monitoring for all 21 motors, multi-mode motion control, advanced trajectory teaching, high-precision sensor calibration, and OTA firmware flashing. The SDK GUI is primarily used for environment setup and code integration checks.
Note
The UI diagrams, parameter settings, and operational workflows described below are based on the Revo 3 Desktop Tool.
1. Getting and Launching the Tools
1.1 Download the Production Desktop Tool (Recommended)
Use for daily debugging, motor limit configuration, action sequence orchestration, sensor calibration, and firmware upgrades.
- Windows: 📥 Revo 3 Desktop Tool (Windows x64) (Supports Windows 10 / 11)
- Linux: No build is published for the version documented here
1.2 Run the Lightweight SDK GUI
Use for SDK integration testing and protocol validation. Supports --mock mode (runs without physical hardware).
cd python
pip install -r requirements.txt

# Start the Qt GUI debugger (supports --mock simulation mode)
python gui/main.py
2. Interface Overview
The Revo 3 Desktop Tool features a clean modular architecture divided into four primary functional zones:
┌─────────────────────────────────────────────────────────────┐
│ Header Bar: Port Connection (Connect) | E-Stop / Restore | Language Toggle │
├─────────────────┬───────────────────────────────────────────┤
│ Hand Status     │ Main Workspace (Core Tabs)                │
│ • SN / Firmware │ • Finger Control                          │
│ • Voltage / Cur │ • Action Sequence                         │
│ • Power / Temp  │ • Teaching Mode                           │
│                 │ • Settings                                │
├─────────────────┴───────────────────────────────────────────┤
│ Log Panel: System State & Diagnostics | Operator Audit Trail │
└─────────────────────────────────────────────────────────────┘- Header Control Bar:
- Connection Management (Connect): Configure serial port, baud rate (default 5 Mbps), and Slave ID (Left Hand: 126, Right Hand: 127). Establish or disconnect the bus link with one click.
- Emergency Stop (E-Stop / Restore): Safety cut-off. In emergencies, click to instantly de-energize all 21 motors and prevent mechanical collisions. Once triggered, toggle to "Restore" to re-enable motors.
- Language Toggle: One-click switch between Chinese and English interfaces.
- Left Hand Status Panel:
- Static Device Info: Displays the connected hand's SKU model, factory serial number (SN), firmware version (FW), and hardware revision (HW).
- System Telemetry: Real-time status flags (Normal/Fault), total bus current (mA), bus voltage (mV), power draw (W), and MCU temperature (℃).
- Core Workspace Tabs:
- Finger Control: Individual and multi-joint motion tuning, real-time feedback, and safety threshold locking.
- Action Sequence: Multi-step gesture timeline arrangement, delay editing, and automated sequence execution.
- Teaching Mode: Zero-resistance manual lead-through teaching, trajectory recording, and playback.
- Settings: Bus protocol parameters, peripheral switch matrix, global overcurrent thresholds, and zero-point calibration.
- Bottom Log Panel:
- System Log: Tracks state transitions, connection handshakes, and diagnostic fault codes.
- Operation Log: Complete audit trail of user parameter changes and dispatched commands.
3. Finger Control and Monitoring
The Finger Control page serves as the primary workspace for joint-level debugging and motion validation, providing per-finger selection, live telemetry, multi-mode control, waveform plotting, and gesture capture.
3.1 Finger Selector and Motor Info Cards
Switch between Thumb, Index, Middle, Ring, and Pinky using the top selector tabs. The workspace dynamically renders the motor cards corresponding to the selected finger (e.g., "Thumb DIP Joint J18"). Each card contains three functional zones:
1. Live Telemetry Monitor
- Diagnostics: Online LED indicator, individual motor serial number, and active fault diagnosis code ("None" when healthy).
- Real-Time Telemetry:
- Position: Actual joint angle in degrees (
°, 0.01° resolution). - Velocity: Actual rotational speed (
rpm). - Current: Real-time motor current (
mA). - Temperature: Onboard motor core temperature (
℃).
- Position: Actual joint angle in degrees (
2. Safety Limit Thresholds (Soft Limits)
Click the lock icon on the card to enable threshold configuration:
- Min / Max Position (deg°): Soft motion limits preventing mechanical interference.
- Max Velocity (rpm): Maximum permitted angular velocity.
- Continuous Current (mA): Thermal threshold triggering overcurrent foldback.
After editing, click 【Apply Params】 at the bottom of the page to save and sync parameters to the hardware.
3. Control Mode Dispatch
Select the target control mode from the dropdown menu:
| Control Mode | Configurable Parameters | Highlights and Applications |
|---|---|---|
| MIT Hybrid Mode | Target Pos, Target Vel, Kp (Stiffness), Kd (Damping), Feedforward Torque | Couples positioning accuracy with compliant impedance. Ideal for robotic manipulation, human interaction, and RL policy transfer. |
| Current Mode | Target Current (mA) | Pure current-loop torque control. Joints are fully compliant, suitable for lead-through teaching and adaptive surface conforming. |
| Position (Trajectory) Mode | Target Position, Acceleration/Deceleration Profile | Trajectory generation reduces overshoot and jerk. Suitable for fixed gesture replay and point-to-point positioning. |
Drag the interactive sliders or enter values to command instant physical joint responses.
3.2 Advanced Debugging Features
- Open Hand (Open): Quickly resets all joint angles of the selected finger to 0° (fully extended posture).
- Dynamic Waveform (Waveform): Launches a dedicated multi-channel telemetry chart dynamically streaming position, velocity, and current at up to 200 Hz.
- Capture to Sequence: Captures the real-time angles of all 21 motors and directly appends the posture as a new step in the Action Sequence tab.
- Data Recording & Visualization (Record & Visualize):
- Record full-hand motor telemetry (timestamps, angles, speeds, currents, temperatures) directly to local CSV files;
- Import historical CSV datasets for visual analysis and trajectory comparison.
4. Action Sequences and Teaching
4.1 Action Sequence Orchestration
Graphically create and test complex multi-step grasping routines:
- Add Keyframes: Insert motion steps via Capture to Sequence or manual angle entry.
- Transition Parameters: Set movement duration (ms), wait delay (ms), and interpolation curves for each step.
- Execution: Supports single-step stepping, continuous looping, and exporting sequence profiles to local configuration files.
4.2 Lead-Through Teaching (Teaching Mode)
- Engage Teaching: Switch all 21 motors to zero-resistance compliant current mode.
- Record Motion: Manually guide the fingers through desired poses while the system records high-frequency joint angle trajectories.
- Playback: Replay the recorded motion stream at configurable speed multipliers.
5. System Settings and Hardware Configuration
The Settings tab manages bus communication parameters, peripheral hardware switches, and global safety limits.
5.1 Bus Communication and Addressing
- Device ID: Configure the Modbus Slave ID (1–247). Default is
126for Left Hand and127for Right Hand. Click "Apply" to save. - Baud Rate: Select the RS-485 bus baud rate (default: 5000000 bps / 5 Mbps). Automatically saved to non-volatile memory.
- Refresh: Re-read all peripheral states, limits, and configurations from the hand.
5.2 Peripheral Hardware Switches (Switch Matrix)
Enable or disable integrated hardware features as needed:
| Switch | Default | Description |
|---|---|---|
| Buzzer | Enabled | System acoustic alerts (boot chime, fault warning). |
| Vibration Motor | Enabled | Haptic feedback actuator inside the hand chassis. |
| Touch Screen | Enabled | Power and display for the integrated status screen. |
| Auto Calibrate on Boot | Disabled | Automatically performs zero homing upon power-up when enabled. |
| Broadcast ID | Enabled | Allows the hand to respond to Modbus broadcast commands at ID 0. |
| Auto-reset Faults | Enabled | Automatically clears recoverable faults (e.g., transient overcurrent) to resume motion. |
5.3 Global Current Thresholds
- Max Continuous Current: Global safety limit for all 21 motors preventing thermal overload during sustained high-load grasps.
6. Zero Calibration and Sensor Alignment (SOP)
Zero calibration ensures accurate physical alignment for all 21 joints. Perform this procedure whenever a motor is serviced, structural parts are replaced, or physical angle drifts are detected.
⚠️ Zero Calibration Standard Operating Procedure (SOP)
Follow this 4-step sequence strictly. Never force joint movement while motors are energized with high stiffness:
- Step 1: Disable Motors
Click 【Disable Motors】 to unpower all finger joints, allowing free manual movement. - Step 2: Align to 0° Reference Pose
Manually straighten all 5 fingers so they are flat, aligned with the palm plane, and lateral abduction is centered (standard 0° flat-palm pose). - Step 3: Enable Motors
Click 【Enable Motors】 to lock the fingers in position, preventing accidental displacement. - Step 4: Set Zero
Click 【Set Zero】 in the dialog and confirm the pop-up prompt. The system permanently saves the current joint angles as the 0° coordinate reference.
6.1 21-Motor Offset Tuning Table
The Zero Calibration dialog provides a fine-tuning table for all 21 motors (M1–M21):
- Offset Tuning (0.01° Resolution): Micro-adjust individual joint offsets to compensate for mechanical tolerances.
- Set Offset: Writes the fine-tuning offsets to onboard Flash.
- Read Offsets: Reads and displays the active offsets stored in hardware.
6.2 System Calibrations and Diagnostics
- Finger Position Cal.: Commands automatic self-calibration against mechanical endstops.
- Current Calibrate: Calibrates zero-point offsets on all 21 current sensor channels to eliminate zero drift.
- Clear Motor Error: Clears temporary protection lockouts across all motors.
- Factory Reset: Restores all settings, switches, and limits to factory defaults.
- Software Restart: Remotely commands an MCU soft reboot. The desktop tool pauses telemetry and reconnects automatically.
7. Firmware Upgrade (OTA DFU)
The desktop tool supports bus-based On-The-Air (OTA) firmware updates for the main controller and motor nodes:
- Navigate to 【Tools】 ➔ 【Firmware Update (OTA)】;
- Click "Browse" to select the
.binfirmware package for your model; - Click "Start Upgrade" to verify and write firmware blocks to onboard Flash (progress updates in real time);
- Upon completion, the hand automatically reboots into the new firmware.
⚠️ Firmware Safety Requirements
- SKU Verification: Firmware packages are hardware-specific. Verify the hardware revision before flashing to avoid incompatibility.
- Stable 24V Power: Ensure stable 24V supply throughout the upgrade. Never disconnect power or communication cables during flashing, as this may corrupt the bootloader.