Unboxing Video
Desktop Tool Operation Guide
1: Device Connection
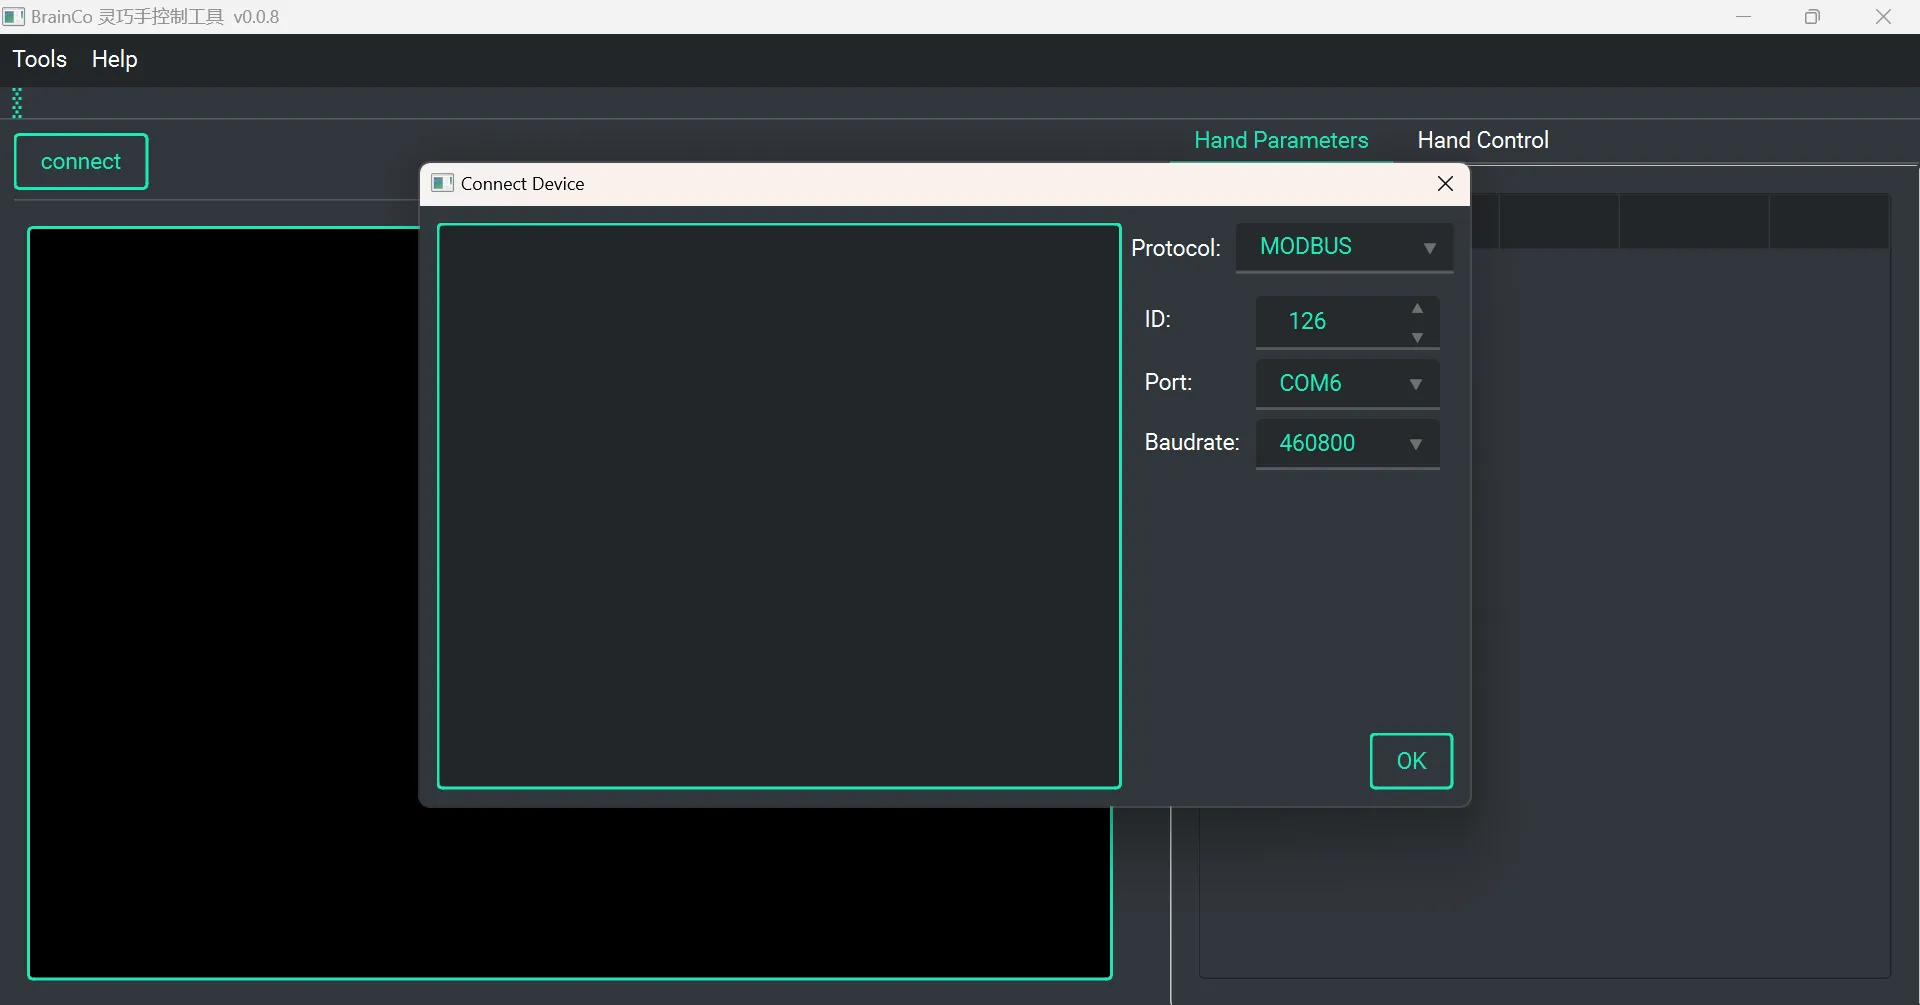
Click 【Connect】 to open the device configuration interface. After selecting the corresponding Device ID, Port Number, and Baud Rate, click 【OK】. Select 【Broadcast】 to issue instructions via broadcasting.
TIP
- The default ID for the left hand is
126, and for the right hand is127. - In non-broadcast mode, the desktop tool will automatically detect the connection status. If the connection fails, please verify that the port number is set correctly.
- If the automatic connection fails, you can try unplugging and re-plugging the RS485-to-serial module or restarting the dexterous hand. If it still doesn't work, click the 【Check】 button to scan all IDs. Please note that this operation may take some time (around 10 minutes).
2: Gesture control
After the device is successfully connected, click 【Motor】 to open the gesture control interface.
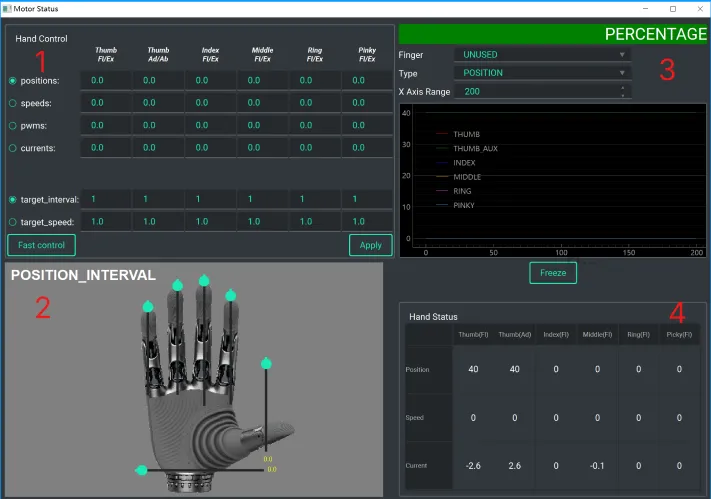
- Area 1: Input parameters to control gestures. You can choose position (0 - 100), speed (-100 - 100), PWM, and various current control modes.
- Area 2: Drag the slider to adjust the finger position.
- Area 3: Real-time display of finger control curves. You can switch tabs to view the
position,speed, andcurrentcurves for different fingers. - Area 4: Real-time display of the current finger parameters.
3: Parameter settings
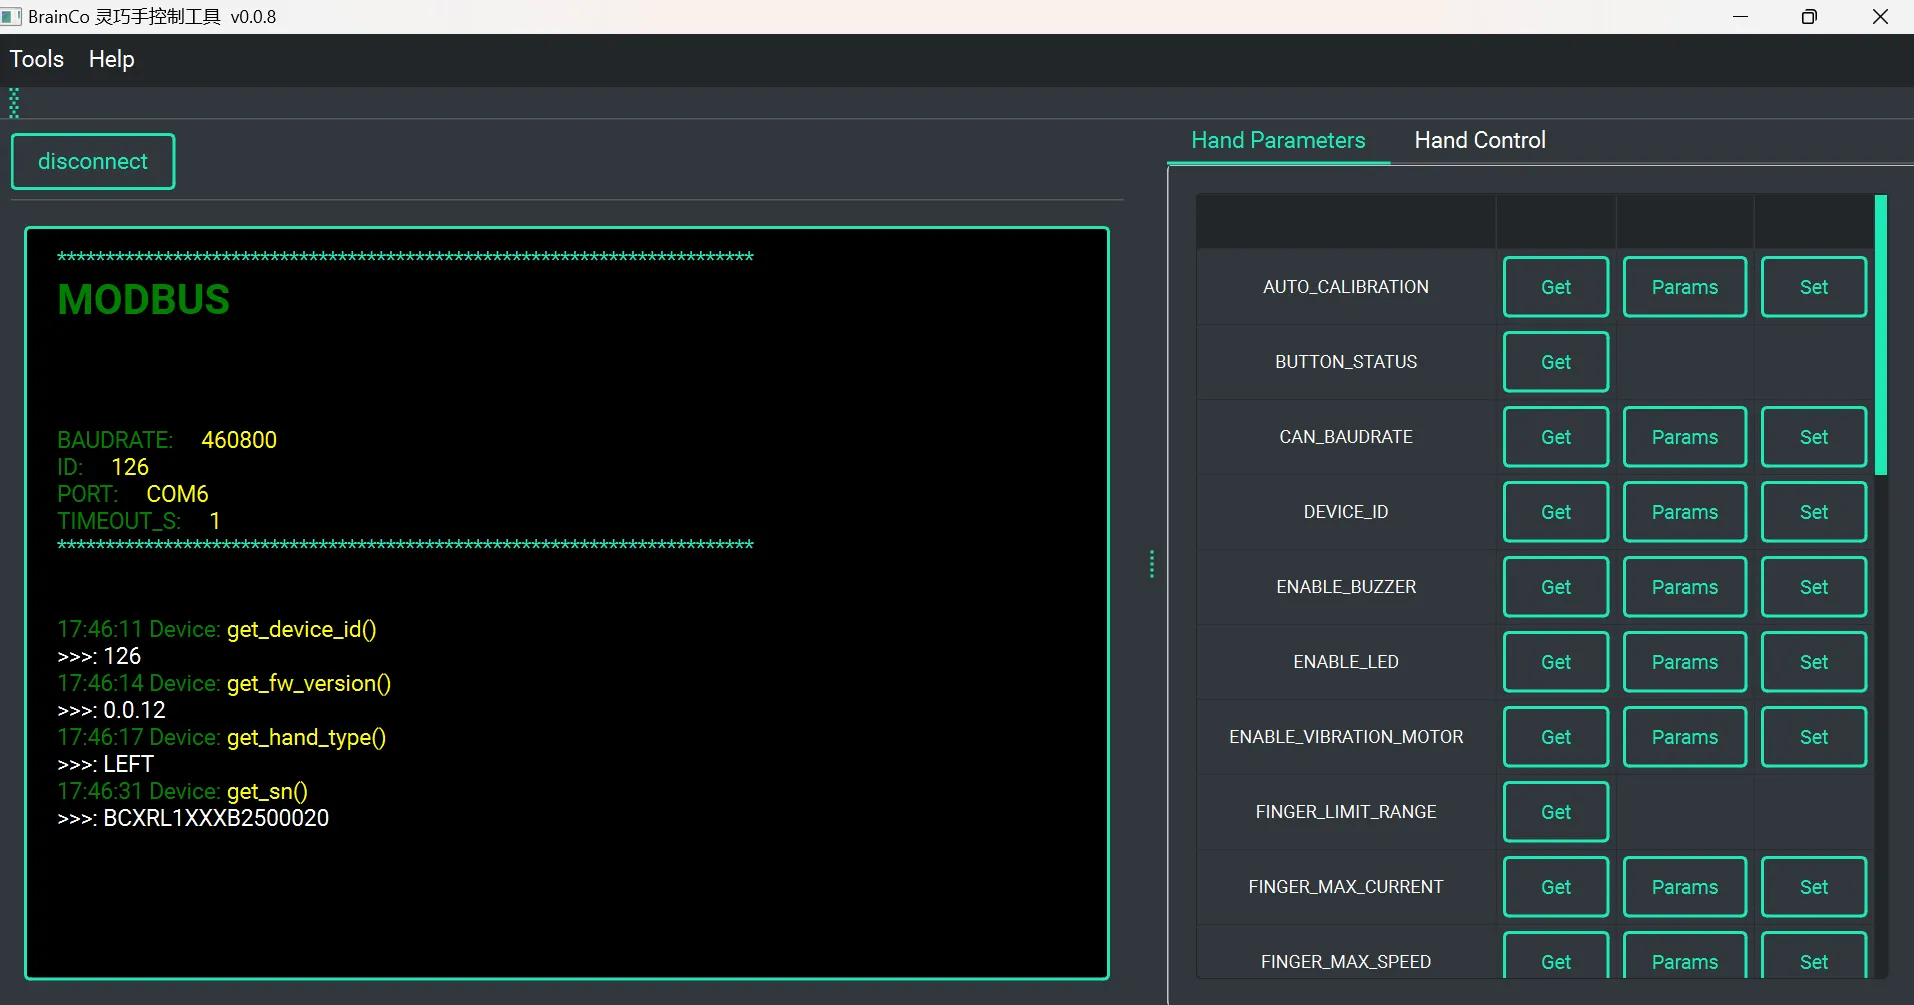
After the device is successfully connected, switch to the 【Hand Parameters】 tab. Here, you can set or get the corresponding device parameters. The 【Instruction Display Area】 on the left side will display the sent and received instruction information.
4: Gesture action sequence
After the device is successfully connected, click 【Action Sequence】 to open the gesture action sequence interface.
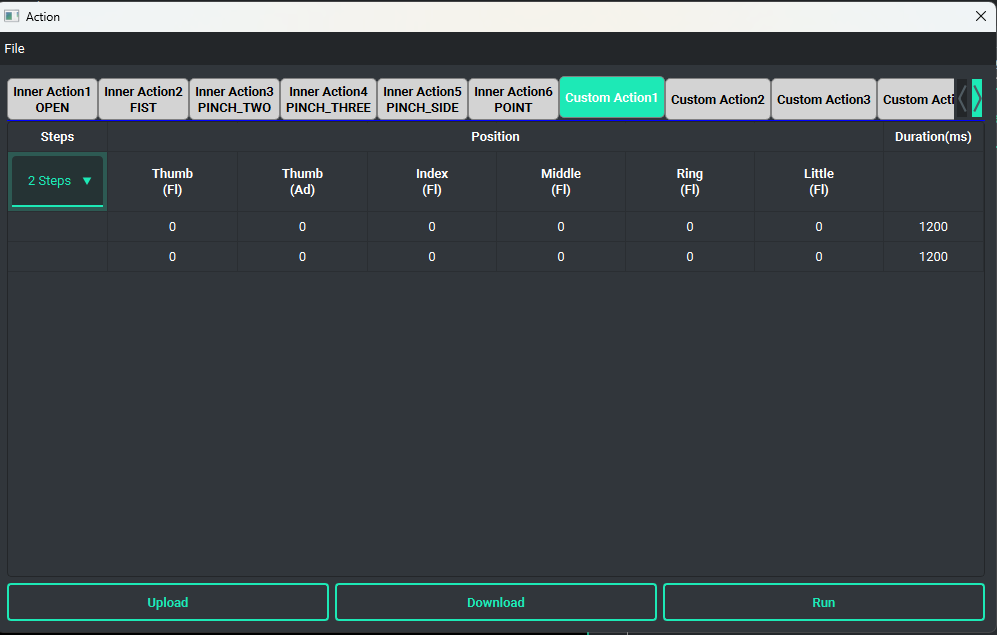
4.1 Action sequence settings
It includes 6 built-in action sequences (open, fist, two-finger pinch, three-finger pinch, side pinch, single-finger tap), as well as 6 customizable action sequences. Each action sequence supports a maximum of 32 steps, and the target finger positions for each step can be configured individually.
- Finger Position: Set the target position of the fingers for a specific step in the action sequence (0 - 100).
- Duration: Set the duration for a specific step in the action sequence.
After configuring the action sequence data, click 【Download】 at the bottom of the table to download the data to the dexterous hand (note that this configuration will be erased after the hand is powered off).
Click 【Upload】 to read the corresponding action sequence from the dexterous hand and display it in the table.
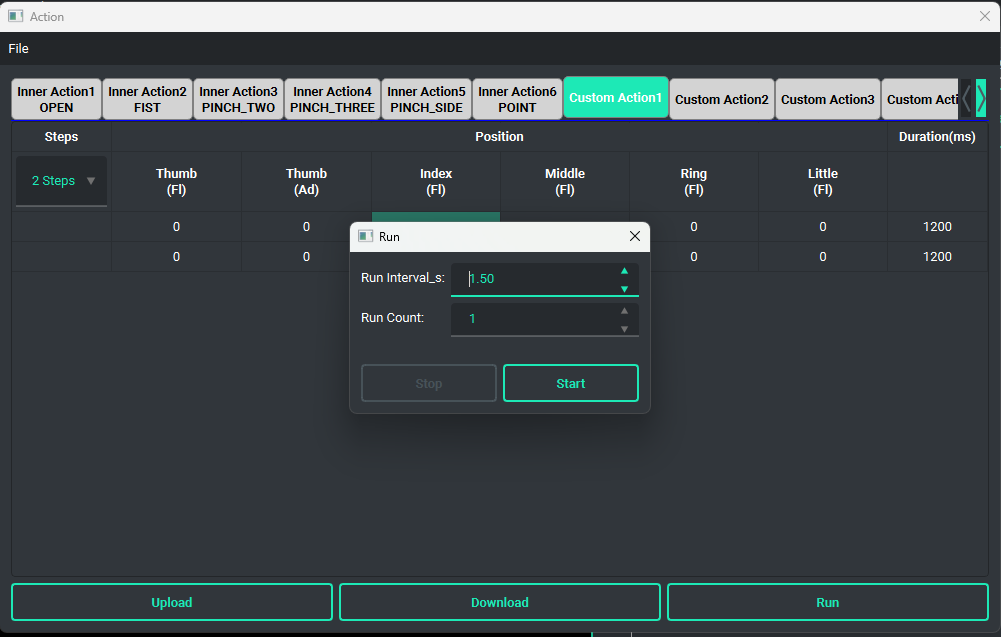
Click 【Run】 to trigger the corresponding action sequence and perform the movements.
- Run Interval_s: The delay time (in seconds) between each execution of the action sequence.
- Run Count: The number of times the action sequence will be executed.
4.2 Offline configuration file
Click the menu File -> Open to load an action sequence file, which will be displayed in the action sequence data table area of the desktop tool.
Click the menu File -> Save As... to export the action sequence data displayed in the table to a specific file.
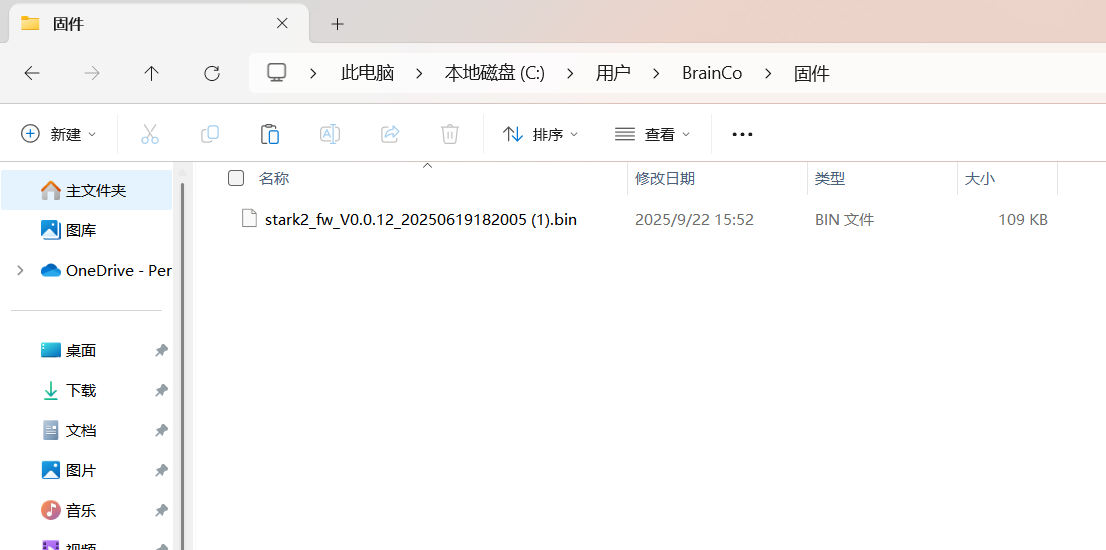
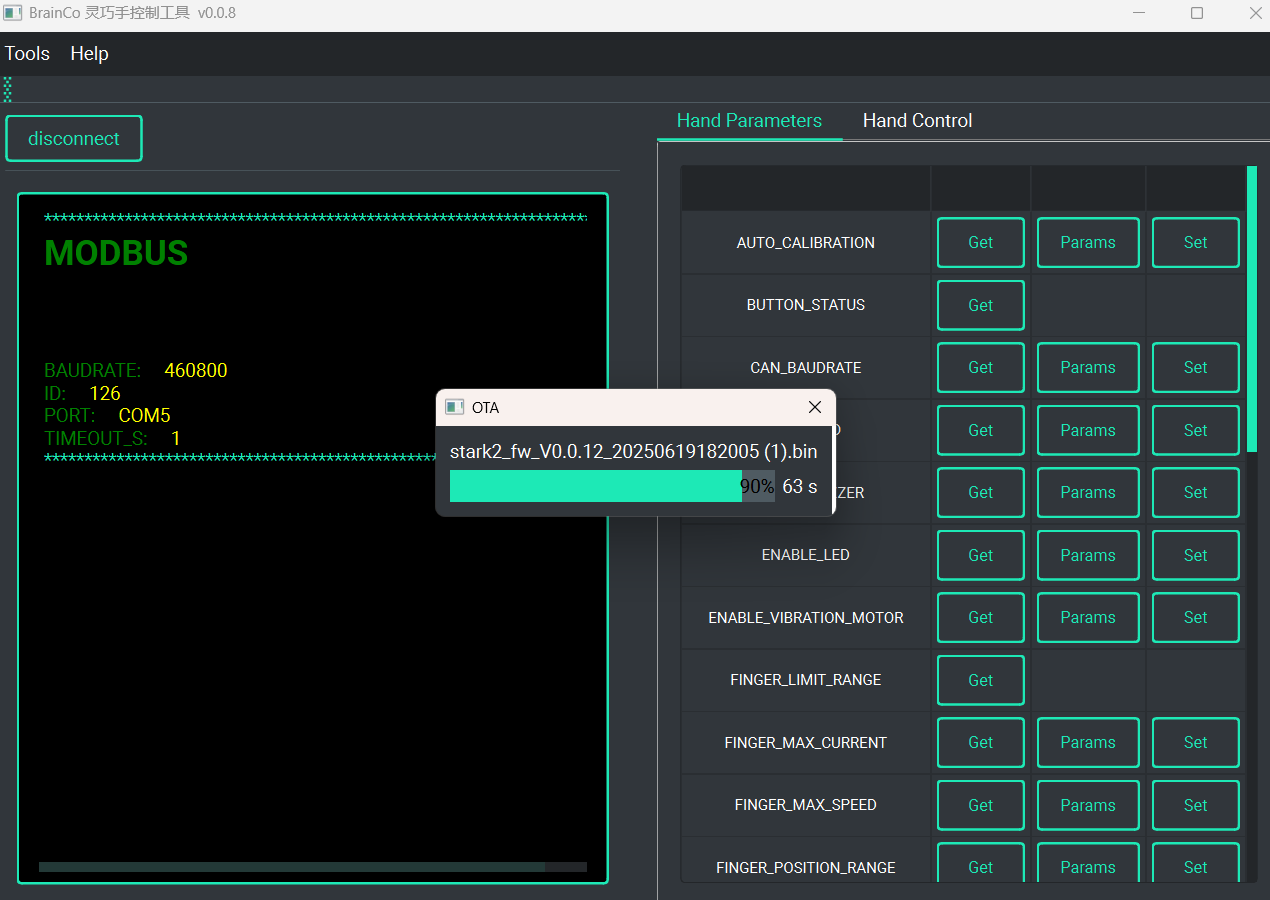
5: OTA
After the device is successfully connected, click on the menu bar Tools -> OTA, and select the corresponding OTA file.
Desktop Tool Firmware Upgrade Tutorial
Device Connection
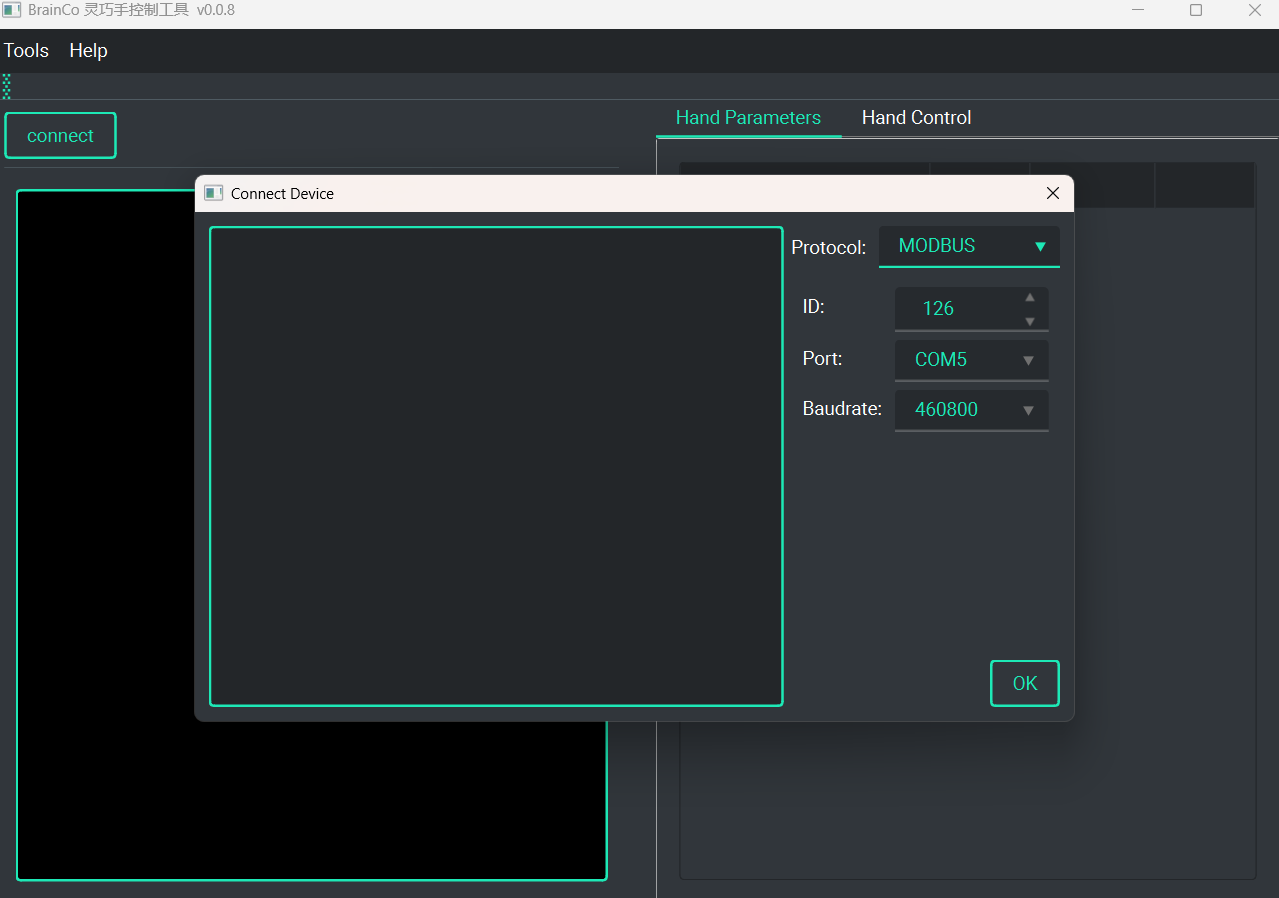
Click 【Connect】 to open the device configuration interface. Select the corresponding Device ID, Port Number, and Baud Rate, then click 【OK】.
TIP
- In non-broadcast mode, the desktop tool will automatically detect the connection status. If the connection fails, please check if the port number is set correctly.
- If the automatic connection fails, you can try unplugging and re-plugging the RS485-to-serial module or restarting the dexterous hand. If this does not work, you can click the 【Check】 button to scan all IDs, noting that this operation may take some time (around 10 minutes).
OTA Firmware Upgrade
WARNING
After the device is successfully connected, click on the menu bar Tools -> OTA, and select the OTA file. Note that the hand must be restarted after the upgrade is complete.