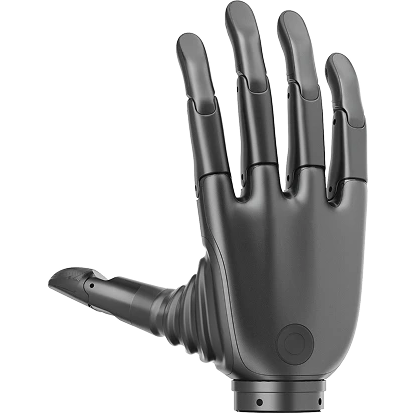
Revo 2 Adaptation for Unitree G1 (Tutorial)
Integration Tutorial
Robot Initialization
- Power on Unitree G1. Refer to the Unitree Support Center | Operation Guide. Upon powering, the status indicator on the back of the dexterous hand will light up, and the fingers will automatically reset.
- Wait (approx. 1 minute) for Unitree G1 to enter Zero-torque Mode, characterized by joint movement without resistance.
- Using the remote controller, press the designated buttons to transition the robot through: Damping Mode → Locked Standing Mode. (Note: Do not enter sports/walk mode for arm development).
Remote Connection
Refer to the Unitree Support Center | Quick Development.
- For initial connection, hook up G1 to your computer via Ethernet. Configure your computer's Ethernet IP in the same subnet:
192.168.123.XXX(e.g.,192.168.123.222):
IP          192.168.123.222
Subnet      255.255.255.0
Gateway     192.168.1.1
DNS 192.168.1.1- Open VS Code, install the "Remote - SSH" extension, add a new remote target, and connect:
ssh unitree@192.168.123.164Enter the password (default: 123). Once connected, open folder /home/unitree/ to access the files.
Open a new terminal, enter
1(which selects the ROS Foxy environment), and press Enter. To reselect, runsource ~/.bashrc.Wi-Fi Configuration: Refer to Unitree Support Center | FAQ → Jetson Orin NX Wi-Fi configuration → STA mode → nmcli configuration. If the Wi-Fi SSID or password contains special characters, Chinese characters, or spaces, enclose them in double quotes:
nmcli device wifi connect "Your_SSID" password "mypass@123!"If you encounter a Not authorized error, prefix the command with sudo.
- Assign Static IP:
# Show wlan0 device details
nmcli device show wlan0

# Check if the desired IP is occupied
nmap -sn 192.168.13.60
# 'Host seems down' means it is available.

# To assign static IP 192.168.13.60:
sudo nmcli connection modify <SSID> ipv4.method manual \
    ipv4.addresses 192.168.13.60/23 \
    ipv4.gateway 192.168.13.1 \
    ipv4.dns "192.168.13.1 8.8.8.8"

# Reconnect to apply settings
sudo nmcli connection down <SSID> && sudo nmcli connection up <SSID>
Dependency Installation
- Install Miniconda. Go to the Miniconda Official Docs, choose
LinuxOS withARM64architecture, and execute the installation commands. - Create a conda environment named
g1braincousing Python 3.8:
conda create -n g1brainco python=3.8
conda activate g1brainco- Install dependencies within the active environment:
# For arm motion control
conda install pinocchio -c conda-forge
pip install meshcat
pip install transitions
# For building ROS 2 under conda environment
pip install rospkg
pip install -U colcon-common-extensions
# Additional dependencies
pip install loguru
pip install matplotlib
pip install empy==3.3.2
pip install lark-parser
Install Unitree ROS 2
- Refer to Unitree Support Center | ROS 2 Communication to install and build
unitree_ros2. - Open
~/unitree_ros2/setup.shand change"enp3s0"to"eth0":
export CYCLONEDDS_URI='<CycloneDDS><Domain><General><Interfaces>
                            <NetworkInterface name="eth0" priority="default" multicast="default" />
                        </Interfaces></General></Domain></CycloneDDS>'
Install BrainCo Stark SDK
- Clone the repository onto the G1 platform:
- Option 1 (Git Clone):
cd ~
git clone https://github.com/BrainCoTech/unitree-g1-brainco-hand.git- Option 2 (Local Upload via SCP):
scp -r unitree-g1-brainco-hand unitree@192.168.XXX.XXX:/home/unitree/- Grant executable permissions:
cd ~/unitree-g1-brainco-hand/brainco_ws
chmod +x ./launch/launch_trans.sh
chmod +x ./launch/launch_robot.sh
Download Unitree G1 Description Model
Get the description assets from: g1-description Open brainco_ws/src/control_py/control_py/action_pkg/robot_control.py and modify the arm_urdf_path to match the local path.
Configure Stark Dexterous Hands
Open ros2_stark_ws/src/ros2_stark_controller/config/params_v2_double.yaml and adjust the parameters to match your specific setup. Default configurations are recommended:
port_l, port_r: Serial port identifiers (e.g., matching the USB-to-RS485 adaptors linked to485_Aand485_B).baudrate: Serial baud rate.slave_id_l, slave_id_r: Modbus slave IDs (default left:0x7e, default right:0x7f).
Build Codebases
# Activate Conda Environment
conda activate g1brainco

# Build brainco_ws
cd ~/unitree-g1-brainco-hand/brainco_ws
python -m colcon build

# Build ros2_stark_ws
cd ~/unitree-g1-brainco-hand/ros2_stark_ws
python -m colcon build
Contact & Support
For questions or purchase inquiries, contact the BrainCo Dexterous Hand Team or submit a support ticket through the page help entry.