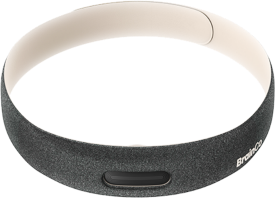
Instructions
Device Operations
- Power ON:
Short pressthe power button - Power OFF:
Short pressthe power button Normalmode: The default state after powering on. Indicates the device is ready to connectPairingmode:Press and holdthe power button until the LED starts blinking blue
LED Indicators
| Color | Description |
|---|---|
| Breathing white | Normal mode (Ready to connect) |
| Blinking blue | Pairing mode |
| Solid green | Pairing successful |
| Solid orange | Charging |
| Blinking white | Firmware update (OTA) in progress |
Device Connection Process
Check the required permissions
- App
Bluetoothpermission is granted and the systemBluetoothservice is enabled - App
Locationpermission is granted and the systemLocationservice is enabled (Android 6–11) - App has
Scan nearby Bluetooth devicesandConnect Bluetooth devicespermissions (Android 12+)
Key Concepts
Before understanding the connection process, it is important to distinguish between the following two concepts:
1. Current Device Mode
Whether the device is in Pairing mode or Normal mode can only be identified during the BLE scanning phase. This status only represents the device's current broadcast mode and is solely used to determine which connection flow to follow — it cannot be used to determine whether the device has previously been paired with the current host device.
2. Local Pairing Record
The pairing relationship is maintained locally by the App. The device does not provide the ability to query whether it has been previously paired. The local record is primarily used to determine which device mode to look for during scanning:
- No local pairing record → Scan for devices in
Pairingmode - Local pairing record exists → Scan for devices in
Normalmode
Note: The device stores up to 3 most recent pairing records and does not maintain per-host pairing history. If the device has been paired with other host devices, existing pairing information may be overwritten, causing the current host to be treated as "no pairing record" and requiring re-pairing.
1. No Local Pairing Record
- Scan for devices in
Pairingmode - When a device in
Pairingmode is found, tap to establish a BLE connection - Send the
paircommand to initiate pairing (establish a pairing relationship) - Pairing successful: Save the local pairing record and proceed with your application flow
- Pairing failed: Error code
3, prompt the user with "Pairing failed" and guide them to retry
2. Local Pairing Record Exists
- Scan for devices in
Normalmode - When your bonded device is found in
Normalmode, establish a BLE connection - Send the
checkcommand to verify pairing information (validate the existing pairing relationship) - Verification successful: Proceed with your application flow
- Verification failed: Error code
4, prompt the user with "Pairing verification failed" and guide them to re-pair
Error Codes
| Error Code | Scenario | Description |
|---|---|---|
3 | pair failed | Pairing command execution failed, prompt the user to retry |
4 | check failed | Pairing verification failed, guide the user to re-enter the pairing flow |
Note
Whether to send pair or check is determined by the scanned device's broadcast mode, and it must match the current expected flow. If the command does not match the device mode, the device will return the corresponding error code.
Additional Notes
- Whether
pairorcheckfails, the device will return a specific error code that the App can use for prompts or retry guidance pairandcheckcorrespond to "establishing a pairing relationship" and "verifying an existing pairing relationship" respectively — they are two separate commands- The device can only connect to one host device at a time. If the device is already connected to another host, it will not appear in scans
- Do not connect to devices currently broadcasting the
Pairingattribute to avoid multiple hosts competing to connect to the same device - The LED turns green after successful pairing or verification
- Android has a scan frequency limit: do not exceed 5 scans every 30 seconds, otherwise the device may not appear in scan results
- Some Android devices do not return scan results when the app is in the background, such as Xiaomi and Redmi
- The host device should disconnect the GATT connection before the application terminates
OTA - Device Firmware Upgrade
OTA using the OxyZen App (Recommended)
If a firmware upgrade is available, you will receive a prompt after connecting.
OTA using the nRF Connect App
- Download and install the nRF Connect App
- Open the
nRF Connect App, tapScan, then tapConnect - After the device connects successfully, tap
DFUin the upper right corner, selectSelect File, choose the upgrade file, and wait for the upgrade to complete - To verify the firmware version: go to Device Information → Firmware Revision String, and tap the
⬇️button
OTA screenshot
